Customized photo quotes are quite trendy online these days. You can select your favorite quote and your unique wall art printed and delivered. But actually, these are super easy to DIY (do it yourself). If you have some fancy graphics editing software like Adobe Photoshop, it would be great, but even if you don’t, you could still manage to create some decent pieces.
In this guide, we’ll use Apple’s Keynote, and Font Book on Mac OS to create our wall art. But you could achieve similar results with Windows, using Character Map instead of Font Book, and Microsoft Powerpoint instead of Keynote.
We would also use a premium Script font, called Hysteria Santa*. You could use any good script font, not necessarily a commercial one.
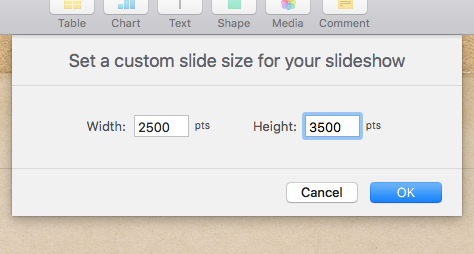
The wall art’s size would, of course, be your choice, but for this kick starter project, we are choosing the A4 size. For a decent print quality, we are keeping the dimensions as 2500 * 3500 (300 ppi)
Once we click-start the Keynote application, we’ll be asked to choose a template. Parchment Template is what we are using for this project, you could even keep your slides blank. In fact, B&W art could look stunning on say, a whitewashed clean wall. You could also insert a picture, your own, or some kind of illustration or a scenic click from the last vacation, possibilities are endless.
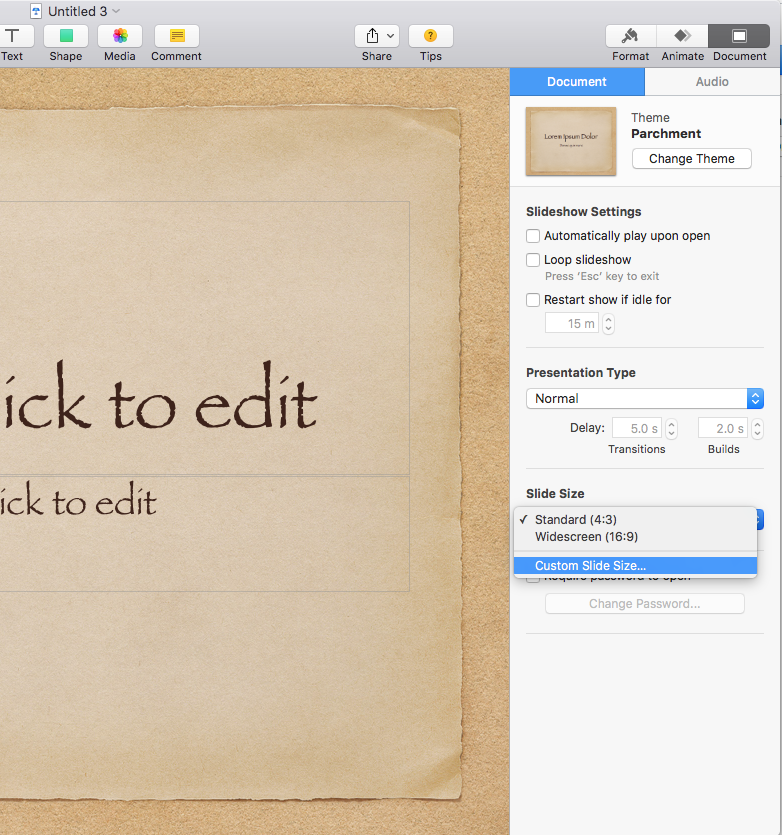
Back to our project, we’ll have to change the resolution of our slides to 2500 * 3500. So select the document panel (Top right, button with a ‘rectangle’ icon)

Click on Slide size drop down, and click on custom slide size. We’ll put the desired dimension in here, and hit enter. (The orientation will change from landscape to portrait.)

Select the most amazing quote which would probably showcase your opinion, or maybe your current state of mind. The theme was this project of ours has such a worn out old paper look, that I thought a beautiful time quote would be just perfect.
This is something I’ve created myself, I just didn’t find something apt on the Internet.
“Time is precious. Moments are like little pearls. The best garland the pearls of moments can create is -- Beautiful Memories.”
I’ve posted an extended version of this thought on my Facebook timeline, but this is enough for our purpose.
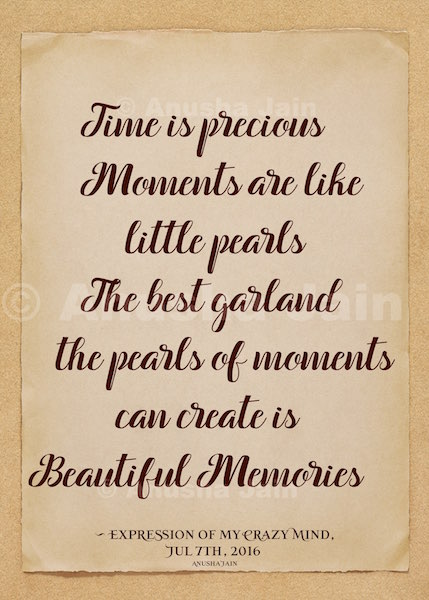
We will get rid of the title and the subtitle, Copy paste the quote, click the Brush icon button from top right to go to the Format Panel, and change the size to something suitable for making it visible. Select the text box and bring it to the center. We’ll change the font to Hysteria Santa, and after little rearrangement and font resizing this is how the slide is looking.

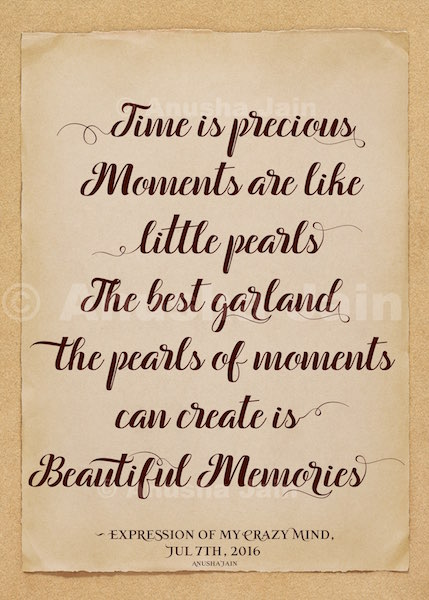
A script font comes with alternate glyphs. These are special extra characters to make your Typography infinitely more attractive. Accessing the alternate Glyphs is easy, Font Book on Mac OS is what we are using, but you could use other applications which support glyphs.
We will need to copy and paste some alternate characters, swirls, and ligatures. After editing it to my heart’s content, here’s what the final image looks like.

Being a general purpose presentation application, Keynote has its limitations as a Typography Creator. If you use a slightly more sophisticated program or spend some more time and effort playing with the background, colors and maybe multiple fonts, you can create even more gorgeous images to decorate your walls. It could be either Adobe Illustrator, or the free and open source Inkscape.
After getting a print of your art, there are many ways to show if off impressively. You could get it framed of course, but there are other interesting DIY ways of encasing it. You could use two wooden bars, paste one on the top, other on the bottom, with a string on the top bar to hang it. Or you could paste small wooden pieces of wood surrounding your quote. Again endless possibilities only limited by your imagination.
References:
*The Article uses a commercial script font Hysteria Santa. I own the commercial license, purchased from FontBundles.net